Mobile
Experimenting More with HDR Photos on the iPhone with TrueHDR and Pro HDR
Last week I posted about my experimenting with the iPhone’s High Dynamic Range (HDR) feature. Since then, I’ve been experimenting with the native functionality that the new iOS update offered as well as two other Apps, TrueHDR and Pro HDR. As you would expect both Apps offer more than what Apple has built in natively, but more doesn’t always mean better.
Well, I guess I should say that more doesn’t always mean just as convenient. The iOS native HDR capability is fast an convenient. One button press and you’re on your way, or the iPhone is on its way to giving you the HDR image you took. With both Pro HDR and TrueHDR you do have more features to choose from, but you also have to wait a bit longer for the photography and the eventual processing. While this isn’t necessarily a bad thing, depending on what you are trying to capture a photo of, it is worth mentioning. Both Apps will set you back $1.99.
Both Apps give you the ability to use an auto mode or Manual Mode to set up exposure to your heart’s content. (all the photos accompanying this post were done in Auto mode.) Both also allow you to take photos already in your library and work the HDR magic on them after the fact. TrueHDR also offers a semi-auto mode for those who want to experiment a little bit, but like me don’t consider themselves knowledgeable in these kind of things.
TrueHDR takes longest of the three to analyze and snap the multiple photos so depending on your subject matter you need to take that into consideration. TrueHDR gives you two modes to work with that affects that timing and the eventual output. The first is Standard which gives you subtler colors, the seond is Enhanced which give syou more vibrant colors and takes longer to do its work.
Both of these Apps give you the option to save multiple exposures to your photo library in case you want to work with them further.
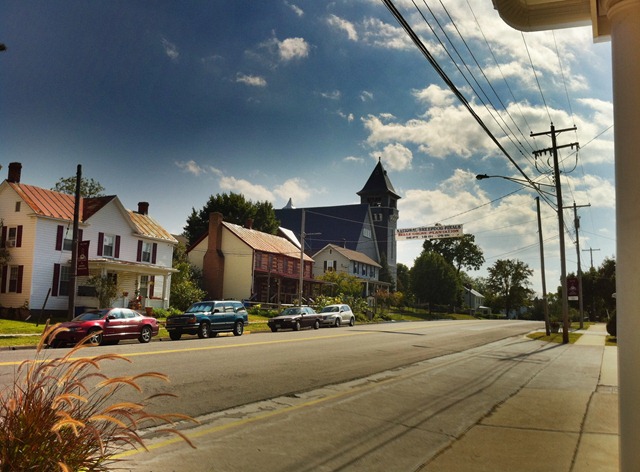
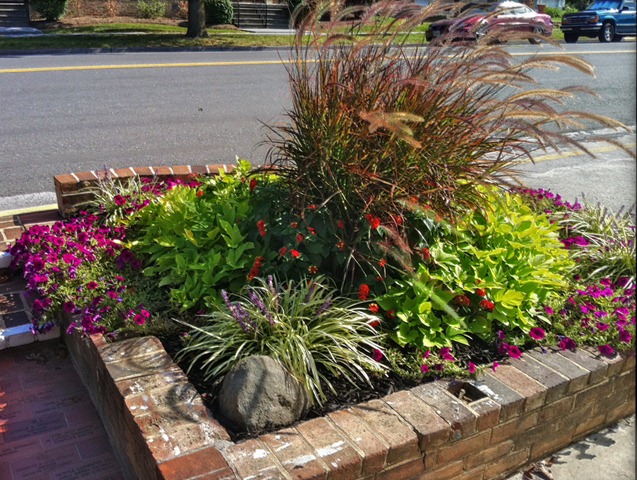
The further intricacies of both Apps give you a lot to work with, but the bottom line is if you want or need to do some HDR photography either will give you better results and more control over what iOS 4.1 offers. In the gallery below you’ll see shots taken with just the iOS HDR, TrueHDR, and Pro HDR in that order left to right. Click on any image for a larger view. As I said in that earlier article, so much depends on the subject and the lighting, but then that’s an entirely different set of discussion topics for those who know more about this me.
 |
 |
 |
 |
 |
 |
 |
 |
 |
 |
 |
 |
 |
 |
 |